Wednesday, January 29, 2014

Color Throwdown 277 and Freshly Made Sketches 121

I must admit this a re-do of a card that I was going to submit to these challenges.  The first one had embossing paste that I had colored blue and used this same stencil by Studio Calico.  It was a bit messy looking and my in-house critic (my daughter) turned her nose up to it.  I took the hint and refined it.  I must say, this is much cleaner, nicer.  I hope you like it.

I chose these colors from Color Throwdown 277.  Such sweet colors.  I am not usually a pastel person, but I can try.  I am always up for the challenge.

Freshly Made Sketches is a favorite of mine.  I love the clean lines, which is really my style.  Not to say that I don't venture out to collage and on a rare occasion Shabby Chic. 

This being my 4th post today, I am saying it's my last one.  I have had a fantastic day off playing, but must get some stuff done.  (I have Bunco tonight!  How fun is that?)

Thanks for stopping by!    Traci

Falling Heart Tree


I am so lucky to have today off.  Once a month, I get a day off in the middle of the week (because I worked the weekend previously).  I have been making cards using all my new stencils.  I was looking online for inspiration and came across Julie Smith's blog Paper and Such.  I absolutely fell in love with that tree of hers.  I had similar dies and decided to CASE her.  I believe in giving credit where it is due...so thank you so much Julie.

Grab Our Badge!My budding tree die is from Memory Box, the dies are from Lawn Fawn and the sentiment die is from Simon Says Stamps.  I layered the focal point mat on pink cs and then pink vellum.  For the base, I used Tim Holtz Bubble Stencil with HA cup o' Joe ink and large dauber.  I made a top folding card, which I normally don't do, but see so many crafters doing it.  I am loving using Neenah Solar White CS.

I am entering this into three challenges.  Shopping our Stash 136 Theme is Cabin Fever.  It's not what you think.  It's to make a card that represents outside.  It could be sports, birds, trees, etc.  Lovely idea.  And my first time to play in their challenge. The second challenge is Colour Q 226.  I just love these colors.  It could be baby girl, anniversary, spring...  To me you can't go wrong with pink.  Of course, this coming for a mom of three girls and one granddaughter!  And finally Mod Squad Challenge Blog where we are to CASE another designer.

Thanks for stopping by!   Traci

Yellow Hello!

Another fun card from the things I learned in the Stenciled! class.  This time I colored my embossing paste with Wild Honey Distressed Ink pad.  I used Tim Holtz Bubble stencil.  To me, the stencil looked like honeycomb.  I love the contrast of yellow and black.  Very Striking.

And I have a confession, I actually purchased the burlap recently.  I have disgressed!  But that's all the embellishment I've purchased in a year.  I just could not resist.  It came in 5.5in width x 1 yard.  So the damage is minimal.  I just love texture!

I am so very glad I took this Stenciled! class.  I've learned so much not only from the teachers but the other students.  Their creations are just beautiful.  I look forward to taking other online classes.  The next one is one layer cards.  And now it comes full circle in my stamping life.  I started 20 years ago with one layer cards.  It was a big deal to have texture/patterned paper on the card!  Funny how so much as changed.

I am entering this into Card Concept Challenge #2.  I would call this a clean and layered, or is it a clean and simple card? It's a bit confusing even though Lesley did try to explain it.  They are encouraging us to use texture, and that I have done no matter what style it is.

Thanks for stopping by!       Traci

More Stenciling

Here I am trying to deplete my stash but still tend of hoard stuff too.  And the hoarding paid off!  Back in the day with light boxes and dry embossing was the thing, I purchased many stencils.  This 6 square was one of them.  I used the technique that was taught in the Stenciled! class. 

The technique is the scribble with pencil in the stencil.  The example used small starts and small hearts.  I tried my hand at circles of a stencil that I made from cs.  I will save that one for later. 

I do like the black lettering for that pop of uncolor! 

Thanks for stopping by!          Traci

Monday, January 27, 2014

Watercolor on Stencils

On to card #2 for tonight!  This is part of the Stenciled class that I took over the weekend.  If I had to choose my favorite technique (at least for now), it's watercoloring.  I purchased this watercolor paper at Michaels.  It works well.  Trying to get adjusted to the ivory color instead of white.  I believe Tim Holtz's watercolor paper is white, so I need to add it to my wishlist.

Anyway, back to this card and technique.  On Day 2 of this class, we learned how to use a stencil to watercolor.  I used two Distressed Ink pads and the Tim Holtz watercolor brush.  It worked wonderfully!  There are a few places where it got a little too watery and bled under the stencil.  I am okay with the imperfection.  It just authenticates that it was handcrafted.  I cut the watercolor paper a bit smaller so I could mat it on this beautiful dark blush color cs. 

It needed a little something extra, like the flowers.  I dug in my punch drawer and found this punch.  The paper for the flowers is a bit lighter than the mat. I inked the edges and then put it in my cushy mat (like for paper piercing), and used the end of my paintbrush (because I couldn't find my stylus) and pressed in the center of the flower so give the flower some dimension.  I used Glossy Accents to adhere it to the card and in the center of the flower.  The sentiment stamp I've had forever!  I used one of the Distressed Inks so I made sure the colors matched.

Thanks for stopping by!       Traci

Creating in My New Place

I finally got moved and settled into my new place.  It's nice to be unpacked and free to do some creating. 

I was debating on taking this online class Stenciled.  Mainly because I worked the weekend of the class and knew more than likely I wouldn't be able to create until after the class was over.  But I took a chance and felt that I can always use the information later. 

So this is one of the techniques that was taught in the class.  You take a stencil, sponge one color. Shift the stencil a bit and stencil another color.  I chose to use this Heidi Swapp 6x6 stencil.  The first color I used was Hero Arts Soft Pool, and the shifts color is HA Soft Granite.  I wanted to get a shadow effect.  I only sponged up a portion of the stencil. 

Another tip I learned in this class is that you can cut out your die in white cs and ink it the color you want.  You can use markers or stamp pads.  Duh!  Why didn't I think of that.  My old way of thinking would be to search high and low in my stash for this color of blue.  Instead I sponged it with my dauber.  I am using all my new stuff that I got for the class, Neenah c/s (I like!), Simon Says Stamp die-hello (I like), Wink of Stella pen (I really like!).  With that being said, I used the Wink of Stella on the sentiments and the large diamonds in my stencil.  I trimmed it down and used foam dots for dimension onto NSW (Neenah Solar White cs).

Now off for more creating!

Thursday, January 16, 2014

Card #257


I started this journey two years ago, using up my stash.  I was pretty good for a while keeping up with how many cards I was able to make with my stash.  And then I quit counting. 

Since I am moving tomorrow (YIKES!!), I thought I would count to see how many of these cards I've made with my stash.  I have given a good many away, so I am not counting those.  Today, in my completed card boxes, I have 257!!  I have gone through a lot of stash with this many cards with still too much to mention.


I tend to be a purger, except when it comes to my stamp supplies.  Why do I hoard this stuff?  I was the same way with fabric when I was sewing.  I think I might take the huge plunge and give it all away.  At least most of it.  I did give away all my alphabet stickers to a co-worker.  She was pleasantly surprised to see how much I had.  And it felt good to let it go.

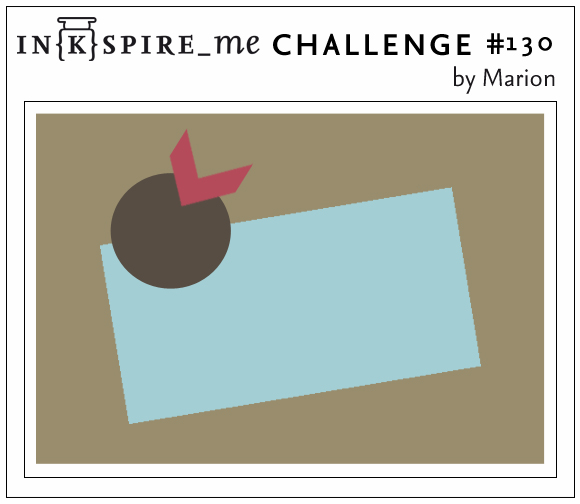
So back to the card I made today. Earlier I was experimenting with watercolor on embossed images.  My previous post shows an excellent example of colors blending well together.  Well, I had one that didn't look so swell.  That is what I used to cut out these arrows.  I got this lovely sketch from IN{K}Spire Me #130.  I haven't participated in their challenges for quite some time.  My stamp set is from Hero Arts as well as the inks, except for the watercolored arrows, those are Distressed Inks.

Thanks for stopping by!    Traci

Watercolor on Embossing

PPA188-SketchHere I am again, stamping and watercoloring when I really should be packing and cleaning.  But I just can't help it!  I watched a You Tube video by Jennifer McGuire this morning and wanted to try the technique.  This is one sample, I do have another where I've highlighted a few small sections of the chevron that I will make later (and knowing me, it will probably be this afternoon).   I stamped on watercolor paper, using Jennifer's advice.  I do not have very many distressed ink pads, but these are perfect together.  The flowers are water colored as well and then die cut (Sizzix thick dies).  The center of the flowers looked so plain, so I rummaged through my stamps and found these 'centers'.  I stamped directly on the ink pad, made my impression and then sprayed water to mute colors.  Finished off with Glossy Accents.  The leaves are also watercolored, the stem is from another stamp set, same technique.  I used my scoreboard to score only where the stem is, slightly folded it up and attached to card just at the stem with glossy accents.  I have to say something about moving, you can find all kinds of things you forgot.  I didn't remember having a paper piercer before.  Found it yesterday and promptly put it in where it really belongs, my stash!  I used it down the left side of the card.  Very subtle, but I wanted to see how it looked.

I really enjoyed this technique which it looks like I will be investing in more colors of distressed inks.  I am using this card for two challenges.  Paper Pal Arts #188.  This sketch is my go-to sketch.  I use it quite a bit.  It is so very versatile.

I am also entering it with Simon Says Stamps Wednesday Challenge, Emboss it!  And so I did!   You could do use embossing paste, or embossing folders, or heat embossing.  It's nice having those options.  Just this week, I've done all three.  To be fair and no back posting, I am using the card I made today.

Thanks for stopping by!    Traci


Wednesday, January 15, 2014

Earthquake Cards

I was going through my stash, pulling some things out to give to a friend and came across this beautiful wisteria flowers from Anna Griffin from many moons ago.  They were on a 12x12 sheet and I just fell in love with them.  I cut them into manageable sizes and then put them away.  Until now.  I am calling these my earthquake cards because I was up (way too late, like 1:35am) creating them when the ground began to shake.  I am not native to CA, but I have become accustomed to them.  They aren't so bad, especially this one.  It was a 4.4.  It's strong enough to get your attention but not too strong to knock things off the wall.  It lasted maybe 10 seconds and then done. 

I was trying some new techniques to me.  I wanted to try 3 different ways using ink and embossing folders.  I love this folder I used.  I don't know the name, but it's certainly appropriate.  This first one, I embossed just plain while cs and ran the stamp pad over the raised edges.  It's the lightest of the three.


This next one is where I rubbed the ink pad on the raised impressions on the embossing folder, put white CS in folder.  The ink transferred to the cs.  It turned out lovely.


This last one I did the opposite of the embossing folder, rubbed the ink pad on the depressed impressions, put white CS in folder.  It definitely looks different.

I had a lot of fun playing with this technique.  It's nice seeing the same card side by side.  I chose sympathy cards since I didn't have a one! 

Thanks for stopping by!    Traci

Sunday, January 12, 2014

Sweet Miss You

I know there is nothing sweet about missing someone, but I love how this card turned out.  I got a new stamp today, Heidi Swap have these 5.25" square stamps.  I got this tree bark texture and chevron.  I love how this turned out.  I used the Hero Arts Soft Granite ink for the bark.  I used Hero Arts Charcoal for the sentiment and bird.  All of this is on a light gray card base.  The heart is one of the hearts from Lawn Fawn (yes, I finally separated them because I got some magnet sheets so I wouldn't lose them).  I love the soft pink.  I think that is what makes it so sweet.  That and the bird. 
207

I got the sketch idea from Operation Write Home Sketch #207.  As I was creating this card, I was imagining a soldier that is missing their honey bunny and wanted a card to express that.  Normally, there is tons of matting on their card samples and I an not huge on that, even though I should so I could get through my stash even quicker.  Last weekend, while I was very sick, I decided to go through all my scraps and cut them into strips, just like the Scrapwrangler said to.  I had SO much! and they were every which shape and size.  I was committed to the program and tossed anything that didn't meet the required minimum size.  At first it was hard, but then I saw how everything was so nice and tidy in strips.  And those strips is what made it super easy to make this card.  I cannot thank Sandy enough for that.

Thanks for stopping by!  Traci

A card full of textures


I was so excited to get started with the Stenciled! class that I decided to try the embossing paste before the class started.  I used this chevron stencil yesterday on a card where I sponged over the stencil.  I tried many different ways to use this technique, which I will show in another blog entry.  This one turned out the most striking.

I am going to back track just a bit, or maybe just go off a rabbit trail.  I find it funny that when I know I have things to do, I can create SO much.  The thing I have to do is pack and clean my apartment.  I am moving on Friday.  I am not a pack rat.  I get rid of things all the time that I don't use.  I told my daughter that if we haven't use it since we moved in (3 years ago) then either trash it or give it away.  So the packing is easy if we don't have a lot to pack.  Cleaning is a different story.  And I will put that off as long as possible.  Because of the move, I needed to get some spackling and a putty knife to fill in those pesky holes.  And that spackling looks a lot like embossing paste, so I thought I would try it out.  Granted, my embossing paste has not come in yet so I don't have anything to compare to.  I can tell you this, the spackling smells, is odorous.  I like the way it cleaned up,  I don't like the putty knife I have.  Leaves lines.  But, this is how I learn.


Okay, back to the challenge.  I chose to participate in Freshly Made Sketches #118. I love the simple elegance of the sketch allowing the chevrons to take center stage.  The flower is white chipboard with a star brad in the center.  I put a piece of kraft cs behind the hole.  I didn't want the pink showing through.  The sentiment is heat embossed.  I used foam dots to adhere the pink chevron background to a white card, then the pink sentiment strip has foam dots too.  This card is full of textures.  I just love it.

Thanks for stopping by!  Traci

Saturday, January 11, 2014

5 Minute Card

If I set my timer, I am sure I would have completed this card is 5 minutes or less.  It was that fast!  I am on a roll today, I have my mojo going full speed.  I found this super sweet challenge on Keep it simple! #31.  I started following this blog after becoming acquainted with Christine at Das Kartenchaos over the holiday season when she did her Advent Series.  She is so genuine and very talented. 

Anyway, back to the challenge...the challenge is to use text as the focal point.  The samples the kis team created used alpha dies or word dies.  I don't have anything like that.  And then I remembered the stamps I bought a few years ago from My Favorite Things.  I bought those along with the frame die that phrase fits right into.  This set comes with 4 stamps and I have not used this stamp yet.  What an honor!  I chose the blackboard technique.  I had to add some green somewhere and the hearts (which are my new dies from Lawn Fawn) are a slight accent.  Thank you kis team for the inspiration!

Traci

Paper Pieced Hearts JUGS 223


Hi, my name is Traci and I am a Stamp YouTube Video-aholic. I am addicted to those instructive, beautifly stamped craft items.  I knew it was a problem when I was watching more than doing.  And those scraps don't get used up on their own, do they?  Some good has come from these videos, especially when I was in bed with the flu last week.  Let me show you the one that totally 'freed' me from my scraps.

All I can say is, Thank you so much Sandy!  Now my scraps are manageable. By cutting them into strips and I will eventually get them organized by color, it made it super easy to make this card.  I got the inspiration from Jennifer McGuire, but was unable to upload her video.  I am entering it in the Just Us Girls Challedn 223.  This week's technique is Paper Piecing.


First I used what scrap piece of cs I had on my workstation, which happened to be a white circle.  I chose some coordinating colors that didn't scream Valentine's but gave the sentiment of love.  And of course, you knew that I had to have green.  I cut my strips into thinner strips and glued them on top of the circle.  I used a glue stick on the circle, all over the circle.  I laid the thin strips in random order.  I used my brand new die from Lawn Fawn, Hearts.  There are 6 sizes of hearts in this set.  I chose not to separate the dies in fear on losing one or two because a couple of them are pretty small. Because I didn't separate them the stripes are all different, which is rather cool.  I die cut some pink hearts too and arranged them on my card.  My sentiment is from Hero Arts.  I love that ampersand!  The inside has white CS with pink hearts to echo what's going on on the front.

Thanks for stopping by!

A Little Bird Told Me

I recently bought this set from The Cat's Pajamas.  I love birds and nests. I really like the sayings that came with this set.  I knew that is would be perfect for the challenge at Sketch Saturday Week #292.


I love the combination of tan/kraft/brown and red.  No, you don't have blurry vision, nor is the pic out of focus.  I stamped the nest in Hero Arts Cup o' Joe and then again in Chocolate Chip by Stampin Up.  The bird stamps are textured.  I stamped it in Simon Says Stamp Lipstick Red.  And the eggs are pearls.  I used distressed ink around the edges.  The background Chevron is a stencil from Heidi Swapp that I sponges Hero Arts Cup o'Joe.  It was easy to do and it turned out so nice.

 I am getting a small stash of stencils together for this online class (STENCILED) that I just signed up for last night.  I was contemplating on whether to take the class because of my work schedule.  I happen to be working that weekend.  I decided to go for it.  Looking forward to using that embossing paste that I see so much about.  Anyway, it has a couple of my favorite teachers (Jennifer McGuire and Kristina Werner) and some new ones I don't know as well.  I hope you can join me!  It'll be fun!

Thanks for stopping by!   Traci

Heart in One Layer Card

Another one layered card!  Less is More Week 154 Challenge is a OLC Hearts.  Luckily I had this very old stamp from long ago that I heat embossed onto a pink card.  The card warped for several reasons: it's too thin for all the abuse I was giving it.  Not only did I heat emboss it, but I watercolored on it.  If you read my blog you know that I don't own markers.  If I need to color something in, I stamp my stamp pad onto my craft sheet and use my watercolor pen to transfer the color to the card.  I chose Simon Says Stamp Lipstick Red.  I am going to put this warped card under something heavy until later to see it wants to cooperate. 

Thanks for stopping by!  Traci

Using Chalkboard Technique


I really like using the chalkboard technique.  This week on OWH Midweek Throwdown Challenge is Chalkboard.  I stamped this lovely stamp by Hero Arts in Hero Arts ink Unicorn.  I recently purchased their ink cubes in a variety of colors and am so glad I chose this.  It's a bit gooey but not like pigment ink, so I heat set it.  I colored in the word 'Nicest' with a white pencil for enhance the chalkboard effect.

 You may recognize the sketch.  It's sketch #206 from Operation Write Home that I posted earlier.  I modified it a bit. The bottom layer is vellum that has a stripe.  I want to say I got this 12 years ago from Close to My Heart.  I dug out my photo corners to attach the vellum to the black card base.  I have like a bejillion of those in white, kraft and black.  I promise I won't use them on every card.  The red is very sparkly.  I embossed it with clear embossing powder with my new favorite stamp, Tiny Flags by Hero Arts.  The red is double matted.  On the inside, I used white cs with a strip of red down the left side.

Thanks for stopping by!  Traci

Back at it again!

Each Sunday I am excited to see what sketch challenge Operation Write Home has to offer.  This week was no exception.  Normally, I would get right to it.  But I got bit by the flu bug and was stuck in bed for 4 days.  You know you're really sick if you look at your stamp area and don't have the desire to play.  Thank goodness that is over!  Whew!


206So in celebration of getting better, I pulled out my favorite color...come on, you can guess it... This week's sketch is #206. I absolutely love that tiny flag background stamp.  I have used that almost everyday since I got it. The white lines are actually a stem stamp from Stamps of Life branches4flowers that I straightened and stamped from both end of the cs.  I added the teeny tiniest pearls I had since I didn't want to add bulk to the card. The sentiment is from the same set that I cut so I could stack the saying.  I am having to use my Martha Steward circle cutter.  Getting some circle dies is on my wish list!

Thanks for stopping by!     Traci

Wednesday, January 1, 2014

You're in my Thoughts

This is my second entry for the Colour Me Challenge #1.  I really like this color combination.  Luckily for me, I made these flowers about 18 months ago and put them in my small embellishment stash. Woohoo!  Depleting my stash one embellishment at a time...lol.  These rolled flowers are from My Favorite Things.  I made a dozen in different colors.  For me, they were tricky rolling up, but once I got the hang of it, I decided to make more just to have on hard.  For the centers, I like using these pearls, which happen to be one of the last embellishments I purchased.  I love these pearls, so elegant.  So I treat them like diamonds.

Anyway, I used the Hero Arts Tiny Flag stamp using Hero Arts charcoal ink.  The sentiment was stamped in China Plate Distressed Ink.  And I inked that same blue around the edges.

       Thanks for stopping by!  Traci

Colour Me Challenge #1

I am stamp-lifting a lot today.  I saw Jennifer McGuire do this technique on a video last month and wanted to give it a try.  But first thing first...like the challenge.  I chose to participate in Colour Me...! Challenge #1. The color challenge is Island Indigo and a neurtral.  I don't know what island indigo is, but I do know what indigo is...so that's the direction I went.  Sorry if I totally messed up but I must say, I enjoyed myself!


I thought the gray was a nice neutral for this blue.  And loving this Tiny Flag stamp for the background.  I used charcoal Hero Arts Ink.  I white embossed this stamp on gray patterned paper and the "Nicest" word I white embossed it on that same blue (even though it's hard to tell) 3 times and cut each individual letter out.  I used glossy accents to glue/stack the letters.  It gives the illusion of chipboard. then cut out the total image and used foam tape to attach it to the blue.  I was able to use up a bit of white fiber.

Thanks for stopping by!

Traci

One Layer Card(s) Challenge


Which do I choose?  It's so hard! I found this totally cool challenge called One-Layer Simplicity Challenge and this is their first challenge.  And boy, this is a challenge to me (and probably most stampers).  When I first started stamping (20 years ago), that is all I did, one layer stamping.  The big deal with the heat embossing.  It's so funny to think about it now when there is SO much more out there.  

For both cards I used the same stamp.  It's from Hero Arts and I love, love it!  I made a card earlier that I posted earlier using that stamp.  It's pretty versatile, see?

This card I copied from the Hero Arts blog.  It was too adorable to not give it a try.  I used the dauber on this card and it makes it look like the lanterns are glowing.
Then I thought I would try using this stamp and white heat embossing.  Using the daubers again making this nice rainbow effect.  The stamps inside the garland are the stamps that I took off the wood a couple weeks ago.  Just the right size for this project.  The 'you' came from Hero Arts too.  

The challenge was fun and most definitely a challenge.  I look forward to doing this challenge again.

Thanks for stopping by!